Sunday, 28 August 2016

All stars Christmas tree - 50 makes for Christmas 13/50

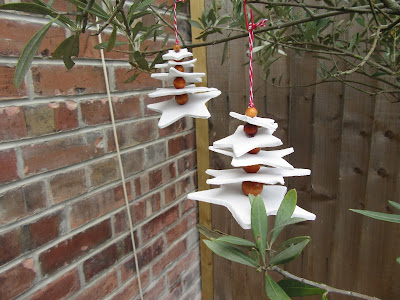
This is called the all star Christmas tree because it is made using all the sizes in my star cookie cutters set.


http://snadralovesblogging.blogspot.co.uk/
All Star Christmas Tree

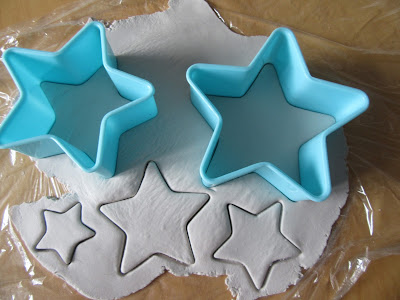
I picked up these star shaped cutters from Wilko for less than a pound, I doesn't look like  they are available on line so could be in store only.   I was drawn to them by the colour, my daughter teases me about my love of the colour blue.


http://snadralovesblogging.blogspot.co.uk/

Blue star shaped cutters
This is a lovely simple make that you could easily do with children, it used up the final bit of the Das modelling clay I have been working my way through since last year .  Just cut out one star in each of the sizes, put a hole in the middle with a drinking straw and leave for a couple of days to dry out.


http://www.hobbycraft.co.uk/advancedsearchresults.aspx?query=das
Cut out one of each size

Once dried they are ready to be threaded on a string or ribbon, I put a bead in between each star and I cut up an old necklace for this.  The bead sizes are graduated so  I thought this would work with the different sized stars.  It also fits with my philosophy of using up things I already have and I can not tell you the last time this necklace was worn,


http://snadralovesblogging.blogspot.co.uk/
Stars and beads ready to be threaded

I used some red and white striped string as I thought it added to the festive flavour.  If I had some red paint I think I might have been tempted to paint the beads but I am quite happy with them in their natural colour.

http://snadralovesblogging.blogspot.co.uk/
Using red and white stripped string to hang from the tree

I think they will be a great addition to my Christmas goodies and will be great for filling one of those annoying gaps you always seem to get on real Christmas trees.


http://snadralovesblogging.blogspot.co.uk/
All Star Christmas Tree
That completes lucky 13 so just another 37 makes to go to complete my 50 makes for Christmas.


I am really enjoying doing these projects over a period of time as I don't feel like I am rushing through to start the next thing.  Is anyone else working on Christmas projects or is it just me and Santa's Elves?


Tuesday, 23 August 2016

Felt Hearts - 50 makes of Christmas 12/50


I pulled out my bag of felt to do a quick "stock take" before starting on my latest project and got a nice surprise as I found some sketches and ideas from last year.  Amongst them were the notes I made for some felt hearts I used in my advent adventure last year.  I liked them so wanted to make some more but a little smaller this year to hang on the tree.


http://snadralovesblogging.blogspot.co.uk/


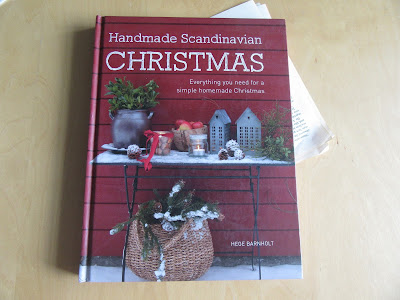
I found the ideal template in one of my favourite book Handmade Scandinavian Christmas this book is filled with simple projects to follow or to provide inspiration for you to develop your own ideas.


https://www.amazon.co.uk/Handmade-Scandinavian-Christmas-Everything-homemade/dp/1446303616/ref=sr_1_1?s=books&ie=UTF8&qid=1471979081&sr=1-1&keywords=handmade+scandinavian+christmas


I picked red grey and white felt in keeping with the colour palette in the book and also fitting into my own colour scheme.


http://snadralovesblogging.blogspot.co.uk/


I cut them out with the pinking shears to give them a bit of extra texture as my plan involves the hearts having external seams. I cut out two layers at the same time so I know that the front and back will have the same imperfections (all part of the handmade charm).

Next came the fun bit, choosing which buttons I would use to decorate them with

http://snadralovesblogging.blogspot.co.uk/


http://snadralovesblogging.blogspot.co.uk/

This is the selection I settled on

http://snadralovesblogging.blogspot.co.uk/


I wanted to hand sew these to add to emphasise the handmade element.  I started by sewing the buttons on the top heart and a short length of ribbon or string onto the back in a loop to hang the finish item from.

http://snadralovesblogging.blogspot.co.uk/


I then started sewing the front and the back pieces together, I stopped about an inch or so away from going all the way round and put in the stuffing, making sure that it was poked into every corner.  Then continued round to the where I started, I added a couple more stitches to help strengthen the hanging loop.


http://snadralovesblogging.blogspot.co.uk/


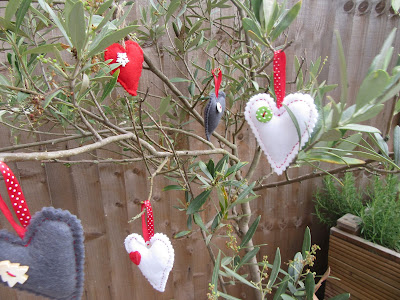
Voila the finished items

http://snadralovesblogging.blogspot.co.uk/


http://snadralovesblogging.blogspot.co.uk/


http://snadralovesblogging.blogspot.co.uk/


I think they look quite cute hanging on my little olive tree on the patio and I might dress it up come December.

Do you put up any decorations in your garden?


Sunday, 21 August 2016

50 makes for Christmas - 1 to 10

This is a quick summary of the first ten projects in my challenge to complete 50 makes for Christmas.  I thought it might be helpful to have them all in one place as I often refer back to things I have already done and as they are squirrelled away around the house it is the first time I have seen them together.


10 Christmas Cushion covers made from tea towels

http://snadralovesblogging.blogspot.co.uk/
Christmas Cushion Cover


9  Decoupage clay decorations

http://snadralovesblogging.blogspot.co.uk/
Decoupage clay ornaments


Washi tape memo pegs

http://snadralovesblogging.blogspot.co.uk/
Washi tape pegs


Blackboard paint dipped clay ornaments

http://snadralovesblogging.blogspot.co.uk
Blackboard paint dipped clay ornaments


Festive Bunting made from old clothes and left over fabric

http://snadralovesblogging.blogspot.co.uk/search?updated-max=2016-08-02T08:13:00%2B01:00&max-results=7
Festive Bunting


washi tape matchbox

http://snadralovesblogging.blogspot.co.uk/2016/07/matchbox-make-over-50-makes-for.html
Washi tape matchbox


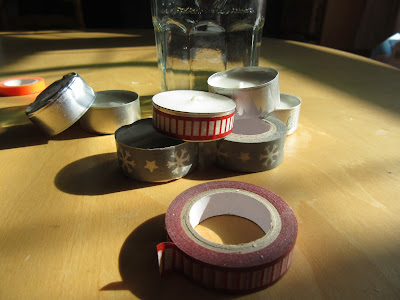
Washi tape tealights

http://snadralovesblogging.blogspot.co.uk/2016/07/up-cycled-tealights-50-makes-for.html
Washi tape tealights


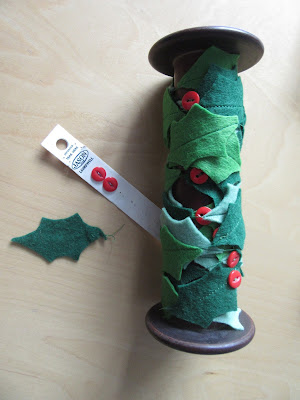
Felt holly garland

http://snadralovesblogging.blogspot.co.uk
Felt holly garland


Bleached Pine Cones

http://snadralovesblogging.blogspot.co.uk/2016/06/bleached-pine-cones-50-makes-of.html
Bleached Pine Cones


Dipped gift tags

http://snadralovesblogging.blogspot.co.uk/2016/06/dipping-gift-tags-50-makes-of-christmas.html
Dipped gift tags


Wow I started this at the beginning of June and now we are are heading towards the end of August, with 40 more makes to go I think I need to increase my crafting activities!

Which is your favourite? I think I am torn between the cushion cover and the holly garland

Friday, 19 August 2016

Infused Booze - 50 makes of Christmas11/50

I am sharing this one with you nice and early as it needs a little bit of prep in order to gather everything together eg saving the right bottles, harvesting the berries, picking up the gin when it is on offer, allowing the flavours to develop


http://snadralovesblogging.blogspot.co.uk/


Hubby is rather partial to the odd drop of sloe gin, and I had hoped to locate some local blackthorn trees in readiness to collect the sloes in Autumn to make my own. Unfortunately I have not been able to find any on my travels so far, so I have looked around for alternatives.  My aim was to use some of the soft fruits from the garden but the birds got there before me!


PINK GRAPEFRUIT GIN

In the absence of garden produce I have gone for a recipe that uses as few ingredients as possible  = Gin plus Grapefruit.  I picked out the recipe from the blog of one tomato two tomato pop in and have a look around she has some really interesting ideas.

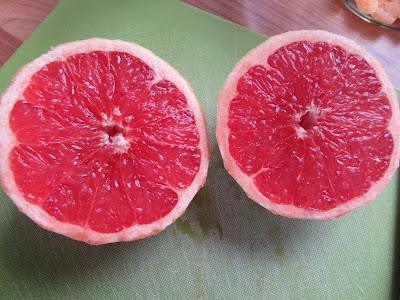
I began by rolling the grapefruit across the counter a couple of times as this is supposed to increase the amount of juice you can squeeze. Then I gave it a wash, the recipe uses both the skin and the juice.

http://snadralovesblogging.blogspot.co.uk/


Remove the zest from the grapefruit, avoiding the white pith, I have used the strip shown in the picture that has a small amount of pith, I will report back if this impacts the taste.


Put the zest in a jar or other suitable vessel

http://snadralovesblogging.blogspot.co.uk/


Squeeze the juice from the grapefruit

http://snadralovesblogging.blogspot.co.uk/


I popped the sieve over the top of the jar to ensure that I didn't get any pips in when I poured in the juice.

http://snadralovesblogging.blogspot.co.uk/

As a guideline this was the amount of juice I got out of my grapefruit

http://snadralovesblogging.blogspot.co.uk/


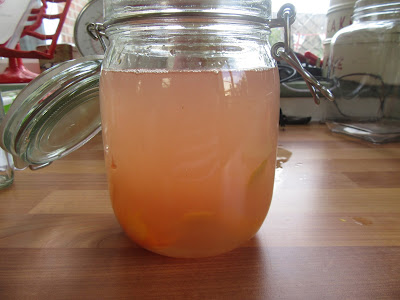
I put in two small bottles of gin as this is what I had in (Hubby picked them up for a bargain price from a My local that was shutting down)

http://snadralovesblogging.blogspot.co.uk/


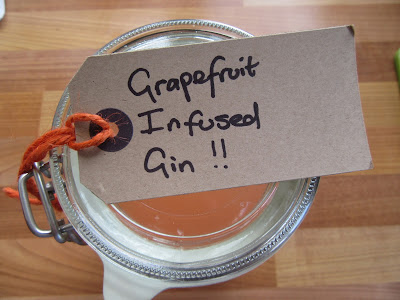
I just popped on a label showing what it was in the jar, on the reverse side I gave  myself an instruction that it needs to infuse for a month and that I should wait before testing.  I have stashed it in the pantry where it will be cool and dark(ish).

http://snadralovesblogging.blogspot.co.uk/


In the interest of research I will do some testing once the month is up and if it has been successful I will bottle and put away, if not I will be researching cocktail recipes that I can hide it in!

These are the other recipes that I liked the look of both gin based but I think that they would also work if you use vodka.


BLACKCURRANT GIN

I am torn between these two recipes this one which encourages the use of a potato masher which I quite like the sound of or This one that suggests covering the spent berries in chocolate which appeals as I hate food waste and I love chocolate


BLACKBERRY AND APPLE GIN

A Larderlove recipe that I have bookmarked to try is this one that has a nice Autumnal sound to it. It will be dependant on me foraging enough blackberries as I really can't bring myself to buy them in the supermarket unless they are drastically reduced at the end of the day as I regard them as "free" food.


Make number 11 completed, just 39 left in my 50 makes for Christmas


Do you have any tried and tested recipes for Sloe gin that are part of your Christmas preparations?



Wednesday, 17 August 2016

From tea towels to Christmas Cushions - 50 makes for Christmas 10/50

Make a Christmas cushion cover has been on my "to do" list for about 3 years and I am so happy that I have finally managed to do it not once but twice!


http://snadralovesblogging.blogspot.co.uk/


It is made from a set of tea towels that I picked up from H&M a short time before Christmas, they were reduced and you know what I am like for finding a "bargain", so I couldn't resist, in fact I brought two packs giving me four tea towels in total. I did think about using them for their intended purpose but saw the potential to become cushion covers straight away.


http://snadralovesblogging.blogspot.co.uk/


This is what I did......

Measured the length of one of the "Holiday"tea towel around the cushion pad and found that it was well short of what was needed.


http://snadralovesblogging.blogspot.co.uk/


The solution  was to cut one of the striped tea towels in half giving enough additional fabric to make two identical envelope cushion covers.


http://snadralovesblogging.blogspot.co.uk/


  • I trimmed the top seam from the "Holiday" tea towel using my pinking shears, this is where the other piece of fabric is going to be joined and it would make the seam too bulky.  
  • Rather than just join the two raw ends together it is important to work out the overlap that creates your "envelope" fastening. Insert your cushion pad work out an overlap of about 3 inches, I was helped here by the design on the tea towel, pin in place.
  • Pin the side seams, again the fabric of the tea towel was very helpful as I just pinned along one of the red lines. 
  • Pin along the top
  • Remove the pins from the "envelope" fastening and remove the cushion pad
  • Turn to wrong side and "transfer" the pins to the inside so it is ready to be sewn.
  • Before sewing pull though and try the Cushion pad to check that the "fit" is still good, adjust if necessary.
  • I sewed the top first and then the sides, I don't know if there is a proper order for this but it seemed to work for me.
  • I tried the cushion pad and was happy with the fit so I trimmed the excess off with my pinking shears and gave it a good press


I am really happy with the result and now just need to find some time and some motivation to make another pair of cushion covers ready to put on in the new year when these get tucked away ready for next year.


http://snadralovesblogging.blogspot.co.uk/


http://snadralovesblogging.blogspot.co.uk/


http://snadralovesblogging.blogspot.co.uk/


http://snadralovesblogging.blogspot.co.uk/


This is the tenth make of my challenge so just 40 more to go to reach my goal of 50.

I have one of the stripey tea towels left in tact so I will leave that to one side and have a little think about another project, unless any your lovely readers have any good ideas??