Tuesday, 9 August 2016

Decoupage Christmas Ornaments - 50 makes for Christmas 9/50

When I posted this earlier in the month it reminded me that I still had some clay left in the fridge.  I can happily report back that keeping it in a zipped up bag in the fridge has kept it fresh and ready to use.  I would recommend leaving it to come up to room temperature before rolling out, I was a little impatient and it was jolly cold to the touch.


http://snadralovesblogging.blogspot.co.uk/


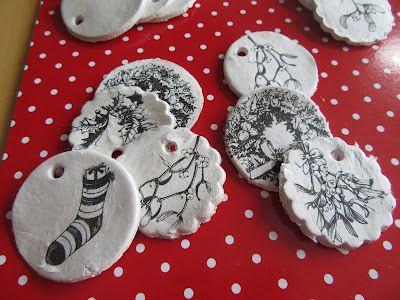
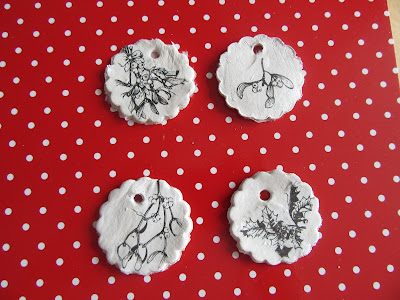
I cut some simple disc with a very small scone cutter that I have never used but looked an ideal size for these little decorations. I left the clay to dry out for a few days and then upgraded them with a little decoupage.  The decoupage idea has been percolating in my head for a while since I saw someone on TV use a paper napkins to decoupage a piece of furniture.


http://snadralovesblogging.blogspot.co.uk/


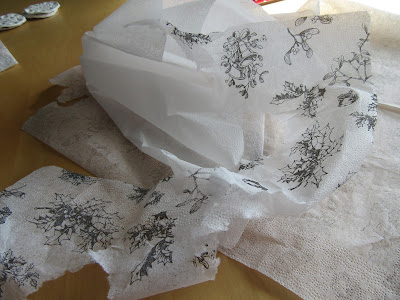
You need to select your napkin design carefully, I was lucky enough to have picked this design up in the January sales which suited this project really well.  Start by separating the layers of the napkin, all you need is the top printed sheet.


http://snadralovesblogging.blogspot.co.uk/


I chose to tear around the designs before sticking them onto the discs.  Because the paper is so thin and I am sticking white to white the background kind of melts into the disc.


http://snadralovesblogging.blogspot.co.uk/


A bit of red and white twine gives them a great festive touch and they are ready to be hung on a branch.  They would also work as gift tags if you only decoupage on one side.


http://snadralovesblogging.blogspot.co.uk/


http://snadralovesblogging.blogspot.co.uk/


http://snadralovesblogging.blogspot.co.uk/


We seem to have been quite busy over the last few days so it was nice to sit down and do something calming and of course it is another make off the list.  Make number 9, the last of the single figures so just 41 makes left in my 50 makes for Christmas challenge.


Friday, 5 August 2016

Washi tape pegs - 50 Makes of Christmas - 8/50

I made some of these last Christmas as part of my Advent Adventure.  Really easy to make provided you have all the bits and pieces to hand


http://snadralovesblogging.blogspot.co.uk/


You will need

Nippy pegs - I got mine from the poundshop a couple of years a go

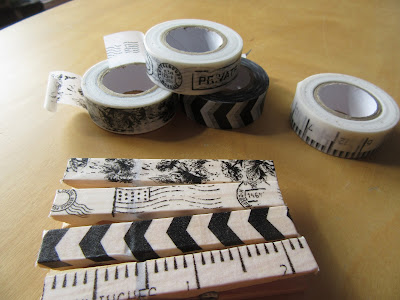
Washi tape or any decorative tape you may have, you could also use duck tape

Magnetic paper (optional)


This is super easy as all you need to do is attach the tape to the peg, not strictly for Christmas use so these can be used all year round.


http://snadralovesblogging.blogspot.co.uk/


It can then be used for


Holding Christmas cards on strings,

Holding baubles onto trees,

Gift tags onto gift bags

Book marks

Attach a name tag to a napkin for your Christmas dinner table

Keeping your coupons and vouchers in one place

Fastening the bread bag


http://snadralovesblogging.blogspot.co.uk/


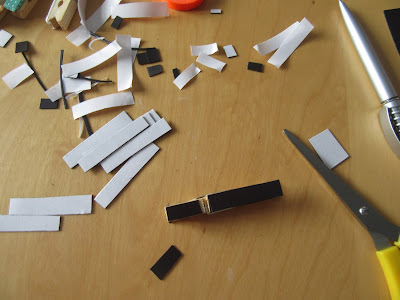
If you have the magnetic paper cut out a strip and attach to the back of the peg, I use two layers as my paper is quite thin. these can then be used to hold important or not important  bits of paper on the fridge door.


http://snadralovesblogging.blogspot.co.uk/


Depending how these are going to be used they can be further embellished with

buttons,
pom poms
Any shapes you have punched out of card or heavy paper
Anything interesting you have laying around.


http://snadralovesblogging.blogspot.co.uk/


I would love to stick a small car on one but It would need a ridiculous amount of magnetic paper on the back! So I need to park that idea for another day.

These make nice gifts and if you don't use Christmas patterns they can be used all year round.

That is make number 8 of my 50 makes for Christmas, almost at the end of single digits


Tuesday, 2 August 2016

When blackboard paint meets air dried clay ornaments! - 50 makes of Christmas 7/50

Last year one of my Christmas makes were these ornaments made with "DAS"air dried clay.  They are incredibly simple to make, just roll out the clay and cut out the shapes using "cookie" cutters. Pop a hole in the top using a straw and leave to dry.  One pack makes loads of ornaments and I still have almost half a pack of Das sitting in my fridge, I guess I should check it is still OK!


http://snadralovesblogging.blogspot.co.uk/


Lovely as they are all in white looking simple and stark I wanted to give some of them a bit of a make over so my trusty and seemingly never ending pot of blackboard paint came out again.  Inspired by my first make of the 50 -  dipped gift tags I gave some of them a little dip.


http://snadralovesblogging.blogspot.co.uk/


And once a little dip has been done a full immersion followed!

http://snadralovesblogging.blogspot.co.uk/


To dry them off I strung a piece of string between two regular size tins with smaller tins sat on top to keep it in place.  Initially I threaded the ornament on the string like I had done with the tags but found this didn't work as well so unfolded paperclips and used them as hooks which did the job pretty well.  For the items that were fully immersed I put them on the hooks and then dipped them in to the paint.


http://snadralovesblogging.blogspot.co.uk/


I am really pleased with them, I think it gives a new look to something I already had and I may go up in the loft to find some baubles to see how they would look with a dip.  I did loose a couple that had been rolled very thinly in the first place and they went soft and soggy when they had been dipped.

http://snadralovesblogging.blogspot.co.uk/


The eagle eyed amongst you will have spotted a second set of dipped tags, I want to play around with a few embellishments, I will post up the results later.


That is make 7 out of my 50 makes for Christmas just 43 more makes to go!

Have you dipped or painted anything like this? have you double dipped?

Friday, 29 July 2016

Christmas Bunting - 50 makes of Christmas 6/50

I must admit that if you say bunting to me it conjours up images of summer days, beach huts and village fetes.  But why should we wait for the sun to come out to put up our bunting when we all need an injection of fun on a gloomy winters day.


http://snadralovesblogging.blogspot.co.uk/


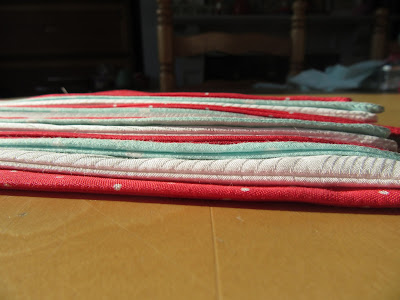
In keeping with my plan to buy as little as possible I have raided the rag bag of old clothes that I have kept to reuse the fabric. One of Hubby's old white shirts and a set of green PJ's that no longer fit me  provided the perfect Christmas colour combination along with some left over fabric from my spotted red top.


http://snadralovesblogging.blogspot.co.uk/


Before I went any further I visited this post on that cute little cake's blog giving 10 things you should know before you make your first bunting.  It highlighted things that I hadn't even thought about and without a doubt saved me from making a complete hash of things.


http://snadralovesblogging.blogspot.co.uk/


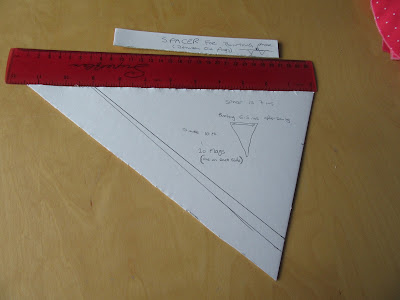
I made a template using a piece of card and some bunting I had brought a few years ago, I drew around it and added 1 cm seam allowance.  The measurements including seam allowance are on the top 19 cm (approx 7.5 ins). Down the middle 27 cm (approx 10.5 ins). Along the side 28.5 cm (11.25 ins).  I also made a small card to act as a "spacer" between the flags this measures 17.5 cms (approx 7 ins).


http://snadralovesblogging.blogspot.co.uk/


Using an approximate calculation of one flag and one spacer being a little over 30 cms (1 foot), you can then calculate how long many flags you need to cut out to get your bunting to the right length. Remember to cut two so if you want 10 flags you will need 20 flags cut out.


http://snadralovesblogging.blogspot.co.uk/


A simple sewing task, put the two pieces face to face leaving the wrong side of the fabric on the outside on both sides. sew only the two long side as the top is enclosed in the binding. Trim the seams and turn through, poke the point out at the bottom using a chopstick or knitting needle and give it a press with the iron to give it a good crisp edge. Clip off the "ears" that are sticking up at the top.


http://snadralovesblogging.blogspot.co.uk/


I will admit to making one purchase for this project and that it the twill tape, I had nothing in that was suitable.  Work out how much tape you will need allowing some at each end to tie it in place.  I used 3 lengths of the spacer but this may have been too generous. Press the tape in half, I popped a few pins in to keep it together just because there is so much of it!


http://snadralovesblogging.blogspot.co.uk/


Organise you flags in the order you want them to be in the bunting I went red, white, green. Mark off the amount you need to tie up the bunting then lay the first flag and pin in place so that the top is sandwiched between the tape. use the spacer to work out where the next flag needs to go and continue along.  Now is the time to make any changes you want before you sew everything in place. Sew along the tape to secure everything in place,


http://snadralovesblogging.blogspot.co.uk/


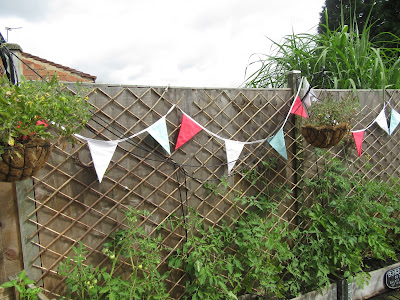
By choosing light colours this could easily have been left in the garden over the summer but I am looking forward to it going up in winter to add a splash of colour.

This is a great way of using up small amounts of fabric, I used one PJ leg and both the fronts off the shirt along with an off cut.  If you are watching the pennies it would make a lovely gift, especially if you could think of something to use instead of the twill tape, although this was only £2.88 for 10 metres on e-bay.

That is make number 6 of my 50 makes for Christmas completed with 44 to go.
Thursday, 21 July 2016

Matchbox make over - 50 makes for Christmas 5/50

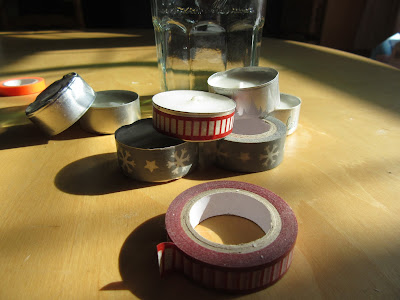
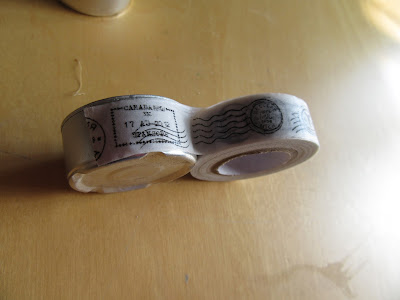
The Washi tapes were out for the T light up-cycle so it seemed like a good idea to do this little make at the same time.

http://snadralovesblogging.blogspot.co.uk/
Matchbox makeover


I was inspired by this post for chalkboard style personalised matchboxes that I saw on Pinterest from Lia Griffith's blog, I know nothing like what I have done! This required sticky labels that I don't have and as I am trying to use up things that I already I have opted for the Washi tape; plus they co-ordinate with the up-cycled T lights.


http://snadralovesblogging.blogspot.co.uk/
T lights and matches for Christmas

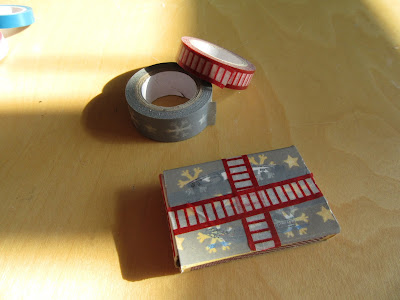
I started with the red tape on the ends as this is a little thinner and I wanted to make sure that the "mechanism" of opening and closing the box is not impeded by applying the tape.


http://snadralovesblogging.blogspot.co.uk/
Using red Washi tape on the end

I applied the Grey tape to the body of the box, unfortunately the design does allow the original print to show through a little.


http://snadralovesblogging.blogspot.co.uk/
Grey Snowflake tape 
In an attempt to disguise this and to give it a little definition I put some of the red tape on to make it look like a gift box tied up with ribbon.

http://snadralovesblogging.blogspot.co.uk/
Looking like a gift wrapped box
They will be going inside the Bonne Maman jam jar along with the T lights to be part of someone's Christmas gift but I think I will be making one for myself too.


http://snadralovesblogging.blogspot.co.uk/
Bonne Maman Jam Jar to Christmas gift
As with the T lights this is not restricted to being a Christmas project and would look just as nice with some vibrant summer colours and could be handy for lighting the BBQ, you are only limited by your imagination and your craft supplies!

So that is 5 makes out of my 50 makes for Christmas done or 10% already completed.  I like this long approach to getting things done, it means I can give my attention to some of the things that wouldn't necessarily get done in the rush to the big day.


Tuesday, 19 July 2016

Up-cycled tealights - 50 makes for Christmas 4/50

On the hottest day of the year so far it seems a little bit strange to be posting another Chrismas make, but this one is quick, simple and not exclusively for Christmas,

http://snadralovesblogging.blogspot.co.uk/
Christmas T lights

It is as simple as sticking a bit of Washi tape around the metal casing on a T light candle, making sure that the tape does not protrude above the edge so it can not catch fire.

http://snadralovesblogging.blogspot.co.uk/
Sticking Washi tape to the case
I am making these to give away as Christmas gifts so I have made some that can be used at any time of the year.

http://snadralovesblogging.blogspot.co.uk/
Bunting tape for Summer
I am presenting  them in an old Bonne Maman jam jar that can also be used to burn a T light candle in.

http://snadralovesblogging.blogspot.co.uk/
Jam jar to T light holder

http://snadralovesblogging.blogspot.co.uk/
Monochrome Washi tape

http://snadralovesblogging.blogspot.co.uk/
Ready to give at Christmas

I am storing them in the pantry to keep them cool, I just hope I remember where I have squirreled them away when it gets nearer to Christmas!

Would you be happy to receive these as a gift?

That is make number 4 of my 50 makes for Christmas so just another 46 to go


Monday, 11 July 2016

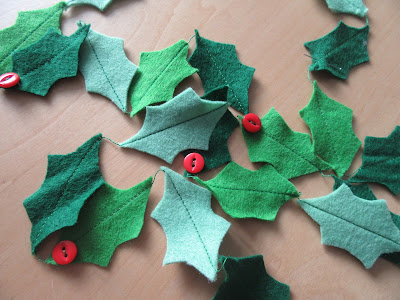
Felt Holly Garland - 50 makes of Christmas 3/50

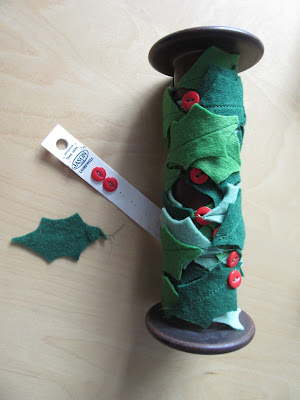
I have accumulated bits and pieces of green felt in various shades and I think I have found the ideal project for using some of them up.

http://snadralovesblogging.blogspot.co.uk/
Felt Holly Garland


This is my kind of projects, simple to make but adds great impact.

I used felt in 3 different shades of green, but one shade would work well too

A holly leaf template taken from this blog post by Wild Olive, some of mine were a little mishapen but that just adds to the charm, if I wanted perfect i wouldn't be making my own!

Green thread to sew it all together, I used up the end of two different shades from my vintage stash

Red buttons to represent berries, these were raided from my vintage collection.

http://snadralovesblogging.blogspot.co.uk/
Adding Vintage Buttons


The amount of leaves you need will depend on the finished length of your garland as a rough guide I cut about 45 leaves and when put end to end they measured a little over 10 feet! I did lose a couple that got eaten up by the sewing machine.

http://snadralovesblogging.blogspot.co.uk/


I used my sewing machine but I think you could also sew by hand although it would take quite some time. Aiming for the centre of the leaf sew along, leave a few stitches before attaching a new leaf to the end of the previous one the short space between the leaves is to help with the "hang"

Holly Garland


I raided my vintage button collection for some nice shiny red buttons for a final flourish.

http://snadralovesblogging.blogspot.co.uk/
Vintage button stash


While I had no qualms about getting ahead and making this in July it did feel a little odd to be hanging it up but I wanted to give you an idea of what it looks like.

http://snadralovesblogging.blogspot.co.uk/
Hanging Holly Garland

I have stored it on one of my old industrial bobbins and I have tucked it away in the spare room ready to be hung a lot nearer to Christmas.


http://snadralovesblogging.blogspot.co.uk/
Vintage Industrial Bobbin

So that is 3 Makes for Christmas in the bag and just 47 left to make.

How are you getting on with your advanced preparations? or are you waiting until later in the year?