Showing posts with label Felt. Show all posts

Friday, 9 September 2016

Felt flower brooch - 50 makes for Christmas 16/50

This is not especially a Christmas make, but I have included it on the list as a suitable Christmas gift.

http://snadralovesblogging.blogspot.co.uk/


I found the instructions for this on Pinterest a couple of years ago but I can't find the link any more so it must have been taken down,


http://snadralovesblogging.blogspot.co.uk/


This is a good project to use up small scraps as the petals are quite small, you just need to draw around a button, penny or 5p and then cut out the circle, It doesn't matter if it is not a perfect circle a bit of variation adds to the overall look.

http://snadralovesblogging.blogspot.co.uk/

I use 5 petals for each flower so you need to cut 15 circles in total.

http://snadralovesblogging.blogspot.co.uk/

In addition you will need to cut a couple of leaf shapes, I just cut these free hand. I would suggest cutting a template on a bit of light card if you don't feel confident to just go for it.  I also cut a small heart shape to mount the brooch back on, this is just a little touch I like to add, a small circle would do the job just as well.

http://snadralovesblogging.blogspot.co.uk/

Pinch the circle together and put in a couple of stitches to hold the shape.  I use yellow embroidery thread to act as the centre of the flower.

http://snadralovesblogging.blogspot.co.uk/


Pinch the next petal add a couple of stitches and attach to first petal, repeat until all 5 petals are attached.  Sew the final one to the first one to create a circle.

http://snadralovesblogging.blogspot.co.uk/

Sew a few stitches in the middle, this will help hold it altogether and create a nice yellow centre for the flower.

http://snadralovesblogging.blogspot.co.uk/

Sew a brooch back onto  heart shape , locate it towards the top of the shape so that it doesn't flop forward when it is being worn.

http://snadralovesblogging.blogspot.co.uk/


Before you sew anything down have a little play around with the position of the leaves and the flowers.  Once you are happy start by attaching the leaves to the heart shape.

http://snadralovesblogging.blogspot.co.uk/

Then start sewing on the flowers.

http://snadralovesblogging.blogspot.co.uk/


Your brooch is completed and ready to wear.


This is actually a replacement for one I made a couple of years ago, I wear an awful lot of blue and white stripped tops and this works a treat of them.  It looks just as good on the lapel of a coat or the handle of your bag.

I think this could be a nice gift for female sports fans as you could use the colours of the team they support.

And that completes make 16 in my 50 makes for Christmas challenge.

Do you make any Christmas gifts for your friends and family or do you feel that they won't be appreciated?



Tuesday, 6 September 2016

Red and White Felt Toadstools - 50 Christmas makes - 15/50

More felt work today, this was inspired by a toadstool brooch I made a couple of years ago, I am glad to say that the brooch is still going strong and I regularly receive nice comments when I wear it.  This was the original inspiration for my brooch

http://snadralovesblogging.blogspot.co.uk/


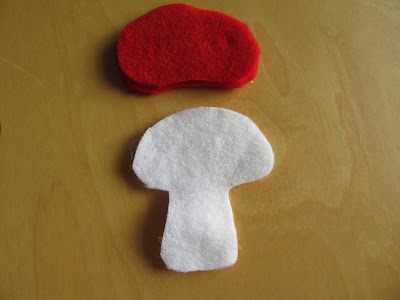
I made a template by drawing the toadstool shape on an old cereal box and played around with it until I got a shape that I was happy with. I then traced round the top that is going to be the red part and made a second template - this needs to be a little bit larger than the base as it sits over the top.

http://snadralovesblogging.blogspot.co.uk/


Cut two red heads and two white head and body.  I cut out double layer of felt so that I could be sure that both sides would be identical.


http://snadralovesblogging.blogspot.co.uk/


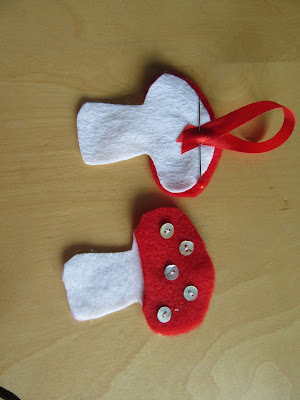
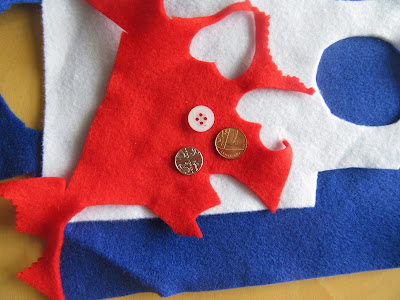
You can cut out small holes in the red heads to allow the white to show through or use very small white buttons as I have done.  These were a bit of an e-bay mistake so I love that I have found a nice way to use some of them. Check that you are sewing the second lot of buttons onto the correct side otherwise you will need to remove them and start again (cough cough ooops).


http://snadralovesblogging.blogspot.co.uk/


Sew in a loop of ribbon to the middle of one of the white "heads" this will be used to hang the finished item on the tree, this sewing is not visible in the finished item.

http://snadralovesblogging.blogspot.co.uk/


Sew the two white pieces together sandwiching the ribbon into the middle. Pop the red head over the top and sew around the sides.


http://snadralovesblogging.blogspot.co.uk/


I chose not to add any stuffing to this as I felt that 4 layers of fabric gave it enough body.


http://snadralovesblogging.blogspot.co.uk/


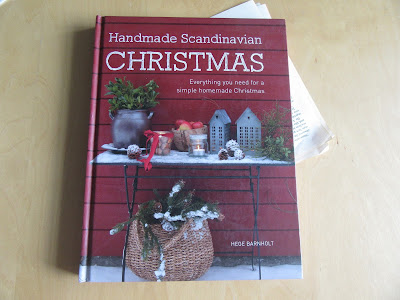
I was looking for a template to help you with this when  I found this (page 48/49) and it involves buttons so I was quickly sold it.  There are a raft of other ideas for Christmas makes, I wish I had found it sooner, I could have just followed some of their instructions instead of fumbling through making things up as I go along!


http://snadralovesblogging.blogspot.co.uk/


So another one off the list, making it 15 out of my 50 makes for Christmas.

Another "photoshoot" using the battered olive tree, I am really selling myself the idea of dressing it up for Christmas.

Good news on the weather front, it looks like we are getting another burst of sunshine before mother nature rolls over into autumn.  This is great news for us as we are off to the Goodwood Revival at the weekend, we have been for the past two years and on each occasion we have been blessed with perfect summer days, fingers crossed we are lucky again.

Have you got any outings planned for the weekend or will you be sitting at home being creative?


Tuesday, 23 August 2016

Felt Hearts - 50 makes of Christmas 12/50


I pulled out my bag of felt to do a quick "stock take" before starting on my latest project and got a nice surprise as I found some sketches and ideas from last year.  Amongst them were the notes I made for some felt hearts I used in my advent adventure last year.  I liked them so wanted to make some more but a little smaller this year to hang on the tree.


http://snadralovesblogging.blogspot.co.uk/


I found the ideal template in one of my favourite book Handmade Scandinavian Christmas this book is filled with simple projects to follow or to provide inspiration for you to develop your own ideas.


https://www.amazon.co.uk/Handmade-Scandinavian-Christmas-Everything-homemade/dp/1446303616/ref=sr_1_1?s=books&ie=UTF8&qid=1471979081&sr=1-1&keywords=handmade+scandinavian+christmas


I picked red grey and white felt in keeping with the colour palette in the book and also fitting into my own colour scheme.


http://snadralovesblogging.blogspot.co.uk/


I cut them out with the pinking shears to give them a bit of extra texture as my plan involves the hearts having external seams. I cut out two layers at the same time so I know that the front and back will have the same imperfections (all part of the handmade charm).

Next came the fun bit, choosing which buttons I would use to decorate them with

http://snadralovesblogging.blogspot.co.uk/


http://snadralovesblogging.blogspot.co.uk/

This is the selection I settled on

http://snadralovesblogging.blogspot.co.uk/


I wanted to hand sew these to add to emphasise the handmade element.  I started by sewing the buttons on the top heart and a short length of ribbon or string onto the back in a loop to hang the finish item from.

http://snadralovesblogging.blogspot.co.uk/


I then started sewing the front and the back pieces together, I stopped about an inch or so away from going all the way round and put in the stuffing, making sure that it was poked into every corner.  Then continued round to the where I started, I added a couple more stitches to help strengthen the hanging loop.


http://snadralovesblogging.blogspot.co.uk/


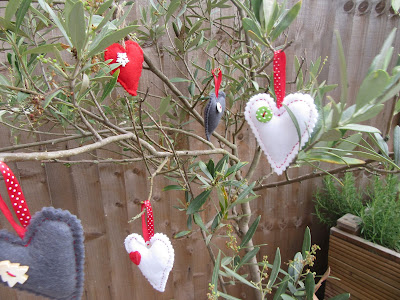
Voila the finished items

http://snadralovesblogging.blogspot.co.uk/


http://snadralovesblogging.blogspot.co.uk/


http://snadralovesblogging.blogspot.co.uk/


I think they look quite cute hanging on my little olive tree on the patio and I might dress it up come December.

Do you put up any decorations in your garden?


Monday, 11 July 2016

Felt Holly Garland - 50 makes of Christmas 3/50

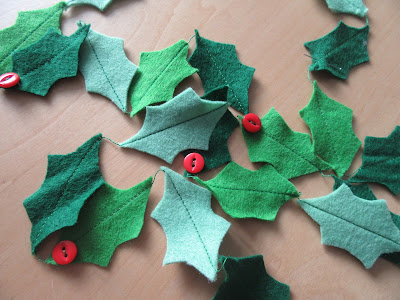
I have accumulated bits and pieces of green felt in various shades and I think I have found the ideal project for using some of them up.

http://snadralovesblogging.blogspot.co.uk/
Felt Holly Garland


This is my kind of projects, simple to make but adds great impact.

I used felt in 3 different shades of green, but one shade would work well too

A holly leaf template taken from this blog post by Wild Olive, some of mine were a little mishapen but that just adds to the charm, if I wanted perfect i wouldn't be making my own!

Green thread to sew it all together, I used up the end of two different shades from my vintage stash

Red buttons to represent berries, these were raided from my vintage collection.

http://snadralovesblogging.blogspot.co.uk/
Adding Vintage Buttons


The amount of leaves you need will depend on the finished length of your garland as a rough guide I cut about 45 leaves and when put end to end they measured a little over 10 feet! I did lose a couple that got eaten up by the sewing machine.

http://snadralovesblogging.blogspot.co.uk/


I used my sewing machine but I think you could also sew by hand although it would take quite some time. Aiming for the centre of the leaf sew along, leave a few stitches before attaching a new leaf to the end of the previous one the short space between the leaves is to help with the "hang"

Holly Garland


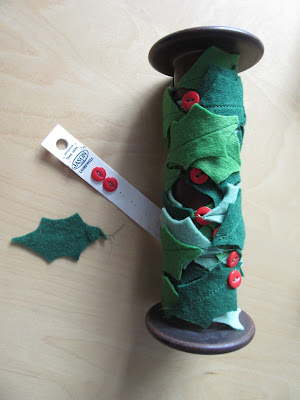
I raided my vintage button collection for some nice shiny red buttons for a final flourish.

http://snadralovesblogging.blogspot.co.uk/
Vintage button stash


While I had no qualms about getting ahead and making this in July it did feel a little odd to be hanging it up but I wanted to give you an idea of what it looks like.

http://snadralovesblogging.blogspot.co.uk/
Hanging Holly Garland

I have stored it on one of my old industrial bobbins and I have tucked it away in the spare room ready to be hung a lot nearer to Christmas.


http://snadralovesblogging.blogspot.co.uk/
Vintage Industrial Bobbin

So that is 3 Makes for Christmas in the bag and just 47 left to make.

How are you getting on with your advanced preparations? or are you waiting until later in the year?