I was thrilled with the dogwood wreath I made last year so it was a no brainer to include it in my list of things to do this year. Of course I need to change it up a bit from last time when I kept it very stark with only a grey linen ribbon and a few clay ornaments.
This year I am looking to hide the dogwood away with a wealth of foliage that I have collected from mine and my daughter's gardens. I had intended to use plenty of holly as we are planning some changes to the bottom part of the garden and this involves removing a much loved holly tree, it came from my Mum's garden as a little twig of a thing and seemed to struggle for a while before picking up and growing into a fine healthy specimen. I had hoped to have uprooted it and replanted it at my daughters as she has a fairly large garden, however there are many holly trees already established and plenty of self seeded saplings so we will need to have a little think about what to do with it.
The Dogwood base was made by creating a circle with one stem and securing it with some wire. More strands were woven in to give it some substance.
I then bound on the base foliage using florists wire and followed this up with bunches of foliage and flowers that were also bound on with the wire. I had a few false starts before I got it where I wanted to to be so my advice would be to play around and learn what works best for you.
The final arrangement is now hanging on my front door and I am hoping it will not fall to pieces all over the postie!
I made a second wreath for my daughter and tried to give it a more modern look with a bit of tinsel and a few baubles. This hides that I was running short of the base foliage and the tinsel was a bit of improvisation to fill in some of the gaps.
I had a lovely but very cold morning exploring this new craft. I don't think the local florist has anything to worry about but I shall be making wreaths again next year.
Make 43 completed from my 50 makes for Christmas challenge with just 7 more posts left to completion.
Showing posts with label Christmas crafting. Show all posts
Showing posts with label Christmas crafting. Show all posts
Saturday, 10 December 2016
Friday, 25 November 2016
Free Christmas Decorations - Hips & Haws 38/50 - 50 makes for Christmas
I have been taking my camera for a walk this Autumn, I think my original intention was to increase the amount of walking I did but once I get my camera in my hand I see photos every few steps so I am not sure that I am actually gaining any benefit other than being in the big outdoors.
In early Autumn I seemed to have a bit of an obsession for photographing Hips and Haws, I was poking round on the internet looking at other peoples photos and a couple came up where they had been used to make Christmas decorations. They had been gathered and then threaded onto wire and shaped into either a wreath or heart shape. I rather liked this as they look like chunky red beads we use in our Christmas decorations, or is it the other way round?

Add a ribbon or a piece of twine on the top to hang them on the tree and bingo a free Christmas decoration. I did have a little chat with my conscience before deciding that I want to make these as I was concerned if I was taking food away from the birds as there is no way of knowing how harsh the winter may be and these could make all the difference to some little soul. My solution - hang them outside on my little olive tree on the patio, we can enjoy them through the glass of the patio doors and they are still accessible to the local wildlife.
However my cunning plan was knocked off course when I went out to collect the hips and haws and there was very scant pickings so I didn't feel comfortable taking anything from what was left. This is an excellent blog post with some fabulous photos (see above) and full of inspiration but may require translating.
I am going to keep this in mind for next year when hopefully there will be an abunance of hips and haws.
I am crossing this off the list as no 38 leaving just 12 makes to complete my 50 makes of Christmas.
In early Autumn I seemed to have a bit of an obsession for photographing Hips and Haws, I was poking round on the internet looking at other peoples photos and a couple came up where they had been used to make Christmas decorations. They had been gathered and then threaded onto wire and shaped into either a wreath or heart shape. I rather liked this as they look like chunky red beads we use in our Christmas decorations, or is it the other way round?

Add a ribbon or a piece of twine on the top to hang them on the tree and bingo a free Christmas decoration. I did have a little chat with my conscience before deciding that I want to make these as I was concerned if I was taking food away from the birds as there is no way of knowing how harsh the winter may be and these could make all the difference to some little soul. My solution - hang them outside on my little olive tree on the patio, we can enjoy them through the glass of the patio doors and they are still accessible to the local wildlife.
However my cunning plan was knocked off course when I went out to collect the hips and haws and there was very scant pickings so I didn't feel comfortable taking anything from what was left. This is an excellent blog post with some fabulous photos (see above) and full of inspiration but may require translating.
I am going to keep this in mind for next year when hopefully there will be an abunance of hips and haws.
I am crossing this off the list as no 38 leaving just 12 makes to complete my 50 makes of Christmas.
Monday, 21 November 2016
Tissue paper pom-poms 37/50 - 50 makes for Christmas
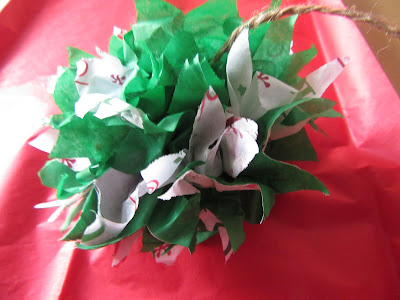
Way back in make September I showed you this make for Paper pom poms out of paper cake cases, although they came together OK they weren't quite the WOW that I was looking. In my Pinterest feed I kept seeing tutorials for these big tissue paper pom poms but thought they would be quite faffy to make, I was so wrong.
All you need to do is take two sheets of tissue paper in differing colours and lay them on top of each other, cut them in half vertically and in half again horizontally, so you end up with 8 sheets of paper stacked in alternating colours.
All you do now is pleat them
Tie a bit of wire around the middle to hold it all together
Cut a curve or a point on the end
Tie a string on the wire in the middle long enough for you to hang it up with
Then the fun begins, you just simply fan them out and pull back each of the layers of papers and your Pom Pom emerges
I have played around with this formula a little and made some smaller versions to put on Christmas presents but they could also be used on your Christmas tree.
I tried it out first time with some tissue that I had saved to reuse, when I realised how easy this was to do I was ready to splash out on some tissue from Hobbycraft as a pound gets you a pack of 10 sheets, however I remembered that about five years ago I had picked some up from the Pound shop in the January sale for 50p! sometimes my magpie tendencies do pay off.
If you are making these in advance don't open them out until you are ready to hang them as they are quite delicate and are very good at collecting dust!
Make 37 done and the 40 mark is on the horizon, I am sure I can squeeze in the rest of my 50 makes for Christmas around hospital visiting and Grandma duties.
What do you think of the pom-pom ? I must confess to being bold over by them
Thursday, 17 November 2016
Pomander oranges - 50 makes of Christmas 36/50
I have been really looking forward to doing this little make ever since I drew up my long list back in the summer. The smell of these is just lovely, I wish I could send it out to you as part of this post, if you are not already in the Christmas mood then this is just the thing to help you on the way. You may think I have gone a bit early with this but my research shows that these should be done early in order for the orange to dry out.
To make this you only need two things Oranges and cloves and the only equipment you need is a skewer or other sharp implement to make a hole with.
Make holes in any pattern or design that you like and push a clove stud into each one. To help me keep my design I put tape around around the middle of the orange in both directions and filled in the gaps with the cloves, this was then removed and I may run a ribbon around. For the spiral I just free handed it.
In an ideal situation these should be popped into the airing cupboard to dry but as we have a combi boiler I am leaving them in the hallway near the radiator so that I can enjoy the smell everytime I come home.
I have kept my designs pretty simple but there are some fabulous intricate designs on Pinterest.

I do like the idea of cutting a design into the skin but I don't have a tool to do this and you know I am all about using up what I already have in and I have had the cloves in the cupboard since last year.
I held a few cloves back to use in some of my Christmas cocktails, I will share more on these soon.
Make 36 completed and only 14 makes left in the challenge of 50 makes for Christmas.
Ar
Which smells do you associate most with Christmas?
To make this you only need two things Oranges and cloves and the only equipment you need is a skewer or other sharp implement to make a hole with.
Make holes in any pattern or design that you like and push a clove stud into each one. To help me keep my design I put tape around around the middle of the orange in both directions and filled in the gaps with the cloves, this was then removed and I may run a ribbon around. For the spiral I just free handed it.
In an ideal situation these should be popped into the airing cupboard to dry but as we have a combi boiler I am leaving them in the hallway near the radiator so that I can enjoy the smell everytime I come home.
I have kept my designs pretty simple but there are some fabulous intricate designs on Pinterest.

I do like the idea of cutting a design into the skin but I don't have a tool to do this and you know I am all about using up what I already have in and I have had the cloves in the cupboard since last year.
I held a few cloves back to use in some of my Christmas cocktails, I will share more on these soon.
Make 36 completed and only 14 makes left in the challenge of 50 makes for Christmas.
Ar
Which smells do you associate most with Christmas?
Sunday, 13 November 2016
Pine cone fire lighter #2 35/50 - 50 makes for Christmas
One of the most popular posts that I have written in the 50 makes for Christmas has been the pine cone firelighters so I wanted to share the # 2 version
Using exactly the same method as last time I used the ends and the very small slices of the oven dried oranges I made. I cut them in half or quarters and just slipped them in at the side of the pine cone. I also incorporated a few bits of woodland debris that were in the bottom of the bag I had used for collecting the pine cones, it is all combustible so I thought I would put it to good use.
This suits the small to medium sizes cones as I found that one of my pine cones was too big to fit anything down the side!
These have been bagged and tagged and are ready to be given as a Christmas present. I am hoping that I will be able to make some incorporating some of the cuttings from my Christmas tree,
Another Christmas present made leaving me just 15 more makes to complete my 50 makes for Christmas
I hope all your Christmas makes are starting to come together, I would love to hear what you are making.
Wednesday, 9 November 2016
Decoupage gift tags 33/50 - 50 makes of Christmas
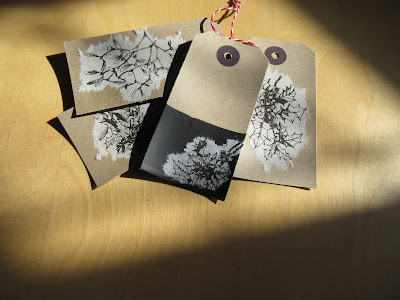
The first post I made for this challenge was my dipped gift tags, well I have been busy with the gift tags again and taken some of those tags a step further by applying decoupage.
The technique is simply to separate a single layer from a paper napkin, tear out the image that you want and glue onto the desired surface. I shared this with you here when I up-cycled some of the clay ornaments I have been making.
It works well with the dipped tags, my only concern is that it might all be a bit monochrome but I am hoping that the use of lashings red ribbons and chunky red wool to attach them to the gifts will remedy that.
I had originally planned to use the red and white stripped string I showed in the photos but I think it does need something more robust to bring in a flash of colour.
They are already to be used, I now have to start sorting out what gifts I already have in that can be wrapped and tagged. Then I need to work out who is left to either buy for or make for.
Number 33 ticked off the list, leaving only 17 makes to go to complete my challenge of 50 makes for Christmas.
Am I the only one who thinks they will wrap their presents as they buy them and then every year I end up in front of a Christmas movie or two with a huge pile of presents and an equally huge pile of wrapping paper and ribbons. The first few are all beautifully wrapped with coordinating ribbons and tags and look like something out of a magazine but by the end you are lucky if there is even enough paper on it let alone a tag!!
Sunday, 6 November 2016
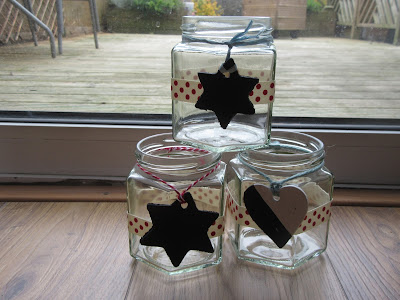
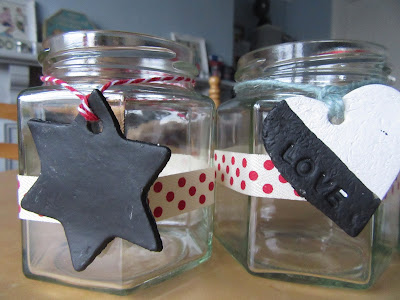
Decorated Christmas Jam Jars 32/50 - 50 makes for Christmas
Three things that are going to get may attention is
1) Something for free
2) Something that can be recycled
3) Something that doesn't take too long to make
This little make ticks all three of these boxes
Free - I am using empty glass jars
Recycled - I am still using empty glass jars
Time - cut something and stick it on or tie something on
They are good for tea light holders and they look good filled with fairy lights,you can stuff them full of goodies and give the to a friend as a gift ( hoping they will share), you can even fill them up with baubles
And at the end of the festivities remove the decorations, give them a wash and either put them in your recycling or use them for something else.
Quick, simple and about as cheap as it gets.
Make 32 done and dusted, leaving 18 more makes to complete my 50 makes for Christmas challenge.
Isn't it funny how any empty jar is a jam jar even if it has previously contained anything from chutney to cheese!
Thursday, 3 November 2016
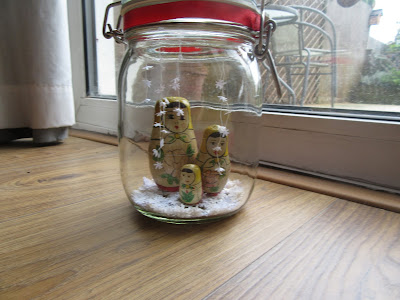
Baboushka snowglobes 31/50 - 50 makes for Christmas
Last year it was tying little trees to the top of toy cars, this year it is snow globes, it seems I always have a bit of a new obsession every Christmas!
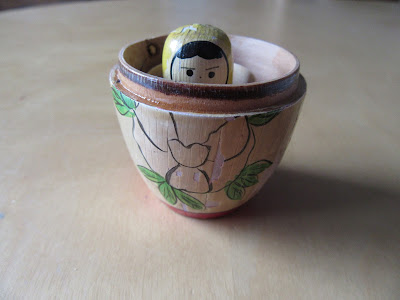
I picked up these little Babushka style stacking dolls in an amazing emporium we have here in Nottingham called the Hopkinson Centre, it is just opposite the Railway station so really handy if you come here by train. It is full of treasures and memories and I could quite easily empty my purse in there several times over!
I brought these girls last year and I put them in a drawer ready to bring out after Christmas for a splash of colour and completely forgot about them. It was only a few weeks ago that I remembered they were there and hit on the idea that they would look sweet in snow globe jars of diminish size. Unfortunately the differences in their sizes was too great for me to find suitable jars so I went for one big one.
I secured them with glue dots and got busy with the snowflake punch, they had come from the shop in a white paper bag so in the spirit of using up what I already have in I made a start on that. Stupidly I threw the waste away but I realised after that I could have incorporated that as decoration on gift tags or bags.
The hanging snowflakes is an idea fresh out of Pinterest and I thought it would work really well with them as the traditional liquid format would not be suitable. I just knotted and threaded the little snowflakes on to white cotton.
Its a fun way to make snow globes without the water and I think you could put anything in the jar from a Nativity scene to a dinosaur! I have some little cars with tree tied to the top of them from my previous obsession they would look cute.
Make 31 ticked off and only 19 left to go to complete the 50 makes for Christmas.
Have you got a project that you are obsessed about this year? or have you already gone through the snow globe craze?
Tuesday, 1 November 2016
50 makes for Christmas makes 21 - 30
With my 30th make completed here is a round up of makes 21 to 30, click on the number to go through to the individual blog post.

21 Twiggy Christmas trees, a project left over from last year
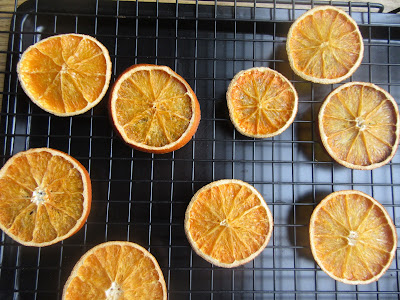
22 Dried Orange slices, I just need to decide which project to use them for first
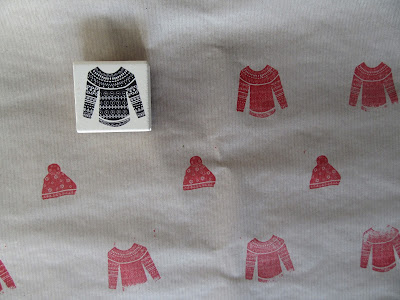
23 Brown paper packages not tied up with string but stamped up ready for Christmas

24 Fabric covered baubles - not a great success!

25 Cookie sugar hand and foot scrub - smells amazing leaves your hands feeling lovely and soft

26 Advent candle jar - simple and super easy

27 Home made Christmas cards cut - stick - write - post
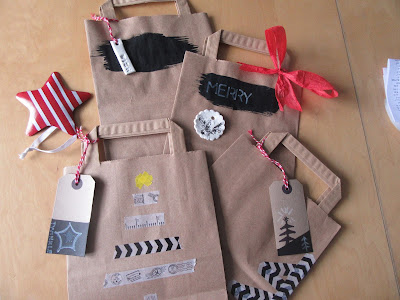
28 Brown paper bags all dressed up for Christmas

29 Possibly the best fudge in the world ever

30 Pine Cone Garland
In case you missed the previous makes here are the first ten and here are the second ten.
I will have my head down for the next ten makes with one eye on my phone waiting to receive the call from my daughter to say that she has gone into labour. Baby is not due until the end of November so I should be good for a while longer (fingers crossed).

21 Twiggy Christmas trees, a project left over from last year

22 Dried Orange slices, I just need to decide which project to use them for first

23 Brown paper packages not tied up with string but stamped up ready for Christmas

24 Fabric covered baubles - not a great success!

25 Cookie sugar hand and foot scrub - smells amazing leaves your hands feeling lovely and soft

26 Advent candle jar - simple and super easy

27 Home made Christmas cards cut - stick - write - post

28 Brown paper bags all dressed up for Christmas

29 Possibly the best fudge in the world ever

30 Pine Cone Garland
In case you missed the previous makes here are the first ten and here are the second ten.
I will have my head down for the next ten makes with one eye on my phone waiting to receive the call from my daughter to say that she has gone into labour. Baby is not due until the end of November so I should be good for a while longer (fingers crossed).
Wednesday, 26 October 2016
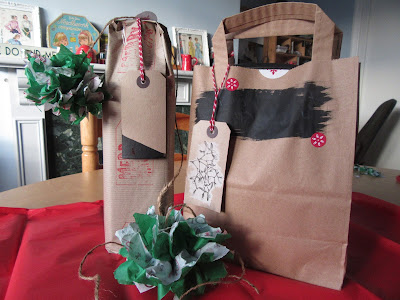
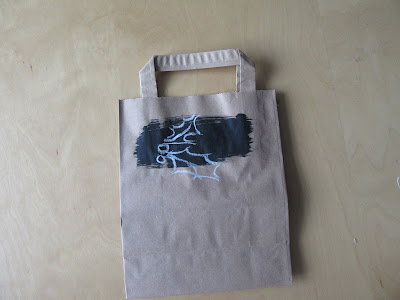
Brown paper gift bags - 50 makes for Christmas 28/50
I feel I must make a confession before we get any further I brought these brown paper bags after I had started this challenge and so this doesn't fall into my criteria of using up things I already had in. They were of course something I consider to be a bargain and I brought them from Amazon with a voucher I earned on Swagbucks so no hard cash was parted with!
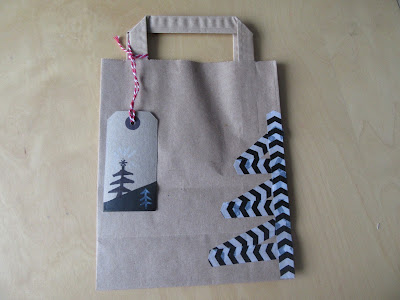
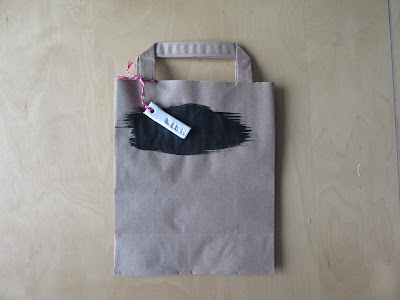
The trusty blackboard paint has been out again for a few of them leaving them open for either a festive message or a little Christmassy design
Complimented by a home-crafted gift tag
One of the many clay decorations
Finally jazzed up with Washi tape

These were great fun to do as I could just do a couple as and when I got a spare 10 minutes.
If you fancy having a go at making your own gift bags here is a tutorial from Tasha at designertrapped, this might come in useful for anything bigger than these lunchbox sized bags.
Make 28 completed and a mere 22 to go in my 50 makes for Christmas challenge.
Do you have any 10 minute makes that you squeeze in to your busy week?
The trusty blackboard paint has been out again for a few of them leaving them open for either a festive message or a little Christmassy design
Complimented by a home-crafted gift tag
One of the many clay decorations
Finally jazzed up with Washi tape

These were great fun to do as I could just do a couple as and when I got a spare 10 minutes.
If you fancy having a go at making your own gift bags here is a tutorial from Tasha at designertrapped, this might come in useful for anything bigger than these lunchbox sized bags.
Make 28 completed and a mere 22 to go in my 50 makes for Christmas challenge.
Do you have any 10 minute makes that you squeeze in to your busy week?
Monday, 24 October 2016
Homemade Christmas Cards 27/50 - 50 makes for Christmas
Another make that wasn't on the original list and I am not sure how it it was missed off as I usually make a few Christmas cards most years.
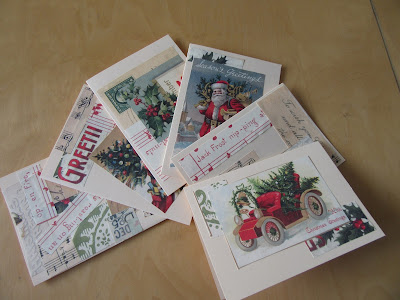
Another bit of using up things I already have in, I brought this wrapping paper about 3 years ago, I tucked it out of the way and forgot about it. It came to light a couple of weeks ago when I was looking for some birthday wrapping paper and I thought BINGO!
The design lends itself very well for a bit of cut and paste and tones nicely with the cream base cards that I have a stack of, they were brought from Hobbycraft a number of years ago, they always seem to have a wide range of card paraphernalia.
There is more than half a sheet of the paper left so I think my family can expect something similar to drop through their letterboxes for the next couple of years!
Make 27 only 3 away from hitting 30, I am starting to think I can make it all the way to the end of the 50 makes for Christmas challenge.
Are you happy to receive home made cards or do you prefer shop brought?
Subscribe to:
Posts (Atom)


