Showing posts with label recycled. Show all posts

Friday, 29 July 2016

Christmas Bunting - 50 makes of Christmas 6/50

I must admit that if you say bunting to me it conjours up images of summer days, beach huts and village fetes.  But why should we wait for the sun to come out to put up our bunting when we all need an injection of fun on a gloomy winters day.


http://snadralovesblogging.blogspot.co.uk/


In keeping with my plan to buy as little as possible I have raided the rag bag of old clothes that I have kept to reuse the fabric. One of Hubby's old white shirts and a set of green PJ's that no longer fit me  provided the perfect Christmas colour combination along with some left over fabric from my spotted red top.


http://snadralovesblogging.blogspot.co.uk/


Before I went any further I visited this post on that cute little cake's blog giving 10 things you should know before you make your first bunting.  It highlighted things that I hadn't even thought about and without a doubt saved me from making a complete hash of things.


http://snadralovesblogging.blogspot.co.uk/


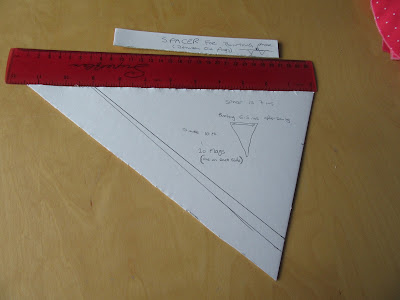
I made a template using a piece of card and some bunting I had brought a few years ago, I drew around it and added 1 cm seam allowance.  The measurements including seam allowance are on the top 19 cm (approx 7.5 ins). Down the middle 27 cm (approx 10.5 ins). Along the side 28.5 cm (11.25 ins).  I also made a small card to act as a "spacer" between the flags this measures 17.5 cms (approx 7 ins).


http://snadralovesblogging.blogspot.co.uk/


Using an approximate calculation of one flag and one spacer being a little over 30 cms (1 foot), you can then calculate how long many flags you need to cut out to get your bunting to the right length. Remember to cut two so if you want 10 flags you will need 20 flags cut out.


http://snadralovesblogging.blogspot.co.uk/


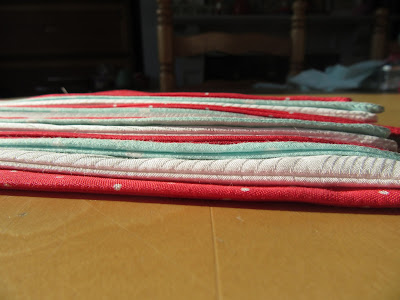
A simple sewing task, put the two pieces face to face leaving the wrong side of the fabric on the outside on both sides. sew only the two long side as the top is enclosed in the binding. Trim the seams and turn through, poke the point out at the bottom using a chopstick or knitting needle and give it a press with the iron to give it a good crisp edge. Clip off the "ears" that are sticking up at the top.


http://snadralovesblogging.blogspot.co.uk/


I will admit to making one purchase for this project and that it the twill tape, I had nothing in that was suitable.  Work out how much tape you will need allowing some at each end to tie it in place.  I used 3 lengths of the spacer but this may have been too generous. Press the tape in half, I popped a few pins in to keep it together just because there is so much of it!


http://snadralovesblogging.blogspot.co.uk/


Organise you flags in the order you want them to be in the bunting I went red, white, green. Mark off the amount you need to tie up the bunting then lay the first flag and pin in place so that the top is sandwiched between the tape. use the spacer to work out where the next flag needs to go and continue along.  Now is the time to make any changes you want before you sew everything in place. Sew along the tape to secure everything in place,


http://snadralovesblogging.blogspot.co.uk/


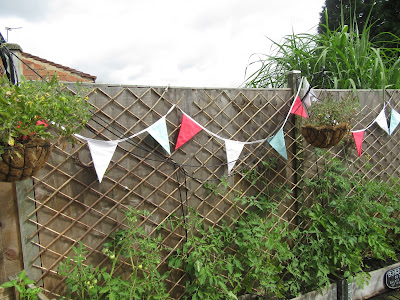
By choosing light colours this could easily have been left in the garden over the summer but I am looking forward to it going up in winter to add a splash of colour.

This is a great way of using up small amounts of fabric, I used one PJ leg and both the fronts off the shirt along with an off cut.  If you are watching the pennies it would make a lovely gift, especially if you could think of something to use instead of the twill tape, although this was only £2.88 for 10 metres on e-bay.

That is make number 6 of my 50 makes for Christmas completed with 44 to go.

Wednesday, 13 January 2016

Free Make 1 - mini paper bunting

I should really have been cutting up T shirts to make strips for my rag rug but I have had this little make in my head since before Christmas and it just wouldn't sit back and wait its turn.


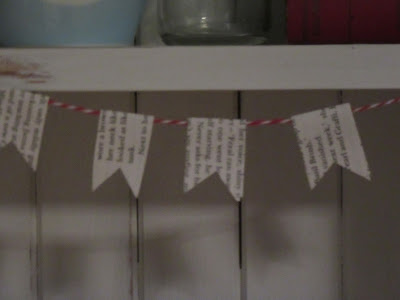
To make this mini bunting I have used pages from the recycled book I brought back from holiday that I am still finding ways to use up. This little project only used one and a bit pages so it hasn't made much of a dent on it!  This does mean that this would be a good project to use up any small pieces of nice paper that you have left over, I think my intention was to try use some of the off cuts when I was doing my Christmas wrapping but it ended up as no more than a thought.

This is how I did it

  • Take a book page and fold it in half long ways
  • Cut down the fold
  • Fold each piece in half long ways again
  • Cut or tear into small flags about the size of the top of your thumb
  • Glue the bottom edge but ensure the top is not stuck down as the thread needs to pass trhough here
  • Cut a little "V" shape into the bottom
  • Thread onto string, you can play around with the spacing and take some off or add more if needed.
  • Hang on the edge of your shelf edge, mantle piece, mirror frame or any where you want.


Initially I put this up using blu-tac and it looked pretty bad especially as it seemed to draw attention to the parts of the shelf where I had made a bad attempted to do some "distressing".  A quick look on Pinterest  and I saw a couple of posts for mini bunting using washi tape and it was a good excuse to crack open the pack of washi tapes I has received for Christmas.


An easy, quick, free make as I didn't pay for the book, the string is recycled from my Advent calendar project, and the glue is of no real cost. I am pleased with the result and now just need to make another string for the next shelf down.


I am intending to feature a few "free makes" in the coming weeks as money is always tight in January and February just when we could do with a bit of cheering up, so keep checking back.


Saturday, 5 September 2015

... paper play with autumn leaves

The weather here has taken a distinctly autumnal turn, cardigans have been in daily use and the big debate about is it cold enough to put the heating on has begun ( we have resisted so far).  My Pinterest feed has been popping up with images showing that I am not the only one to have noticed the change in the season and my Leaf me alone board has been getting regular pins fed into it.

http://snadralovesblogging.blogspot.co.uk/
Autumnal dispaly


I enjoyed my  adventures with recycled paper play and still have plenty of pages of the book left along with some brown paper that had been on a parcel delivered earlier in the week so I decided it was time for a new mobile.


http://snadralovesblogging.blogspot.co.uk/
paper leaf mobile


I toyed with creating different textures by screwing the paper up or by folding it in half to give it a sharp line.  The leaf shapes are a combination of free hand cutting and drawing round some small cookie cutters that I had, it has resulted in a variety of shapes and textures that I am very happy with.  I love the shadows that are cast, it gives the whole thing another dimension.


http://snadralovesblogging.blogspot.co.uk/
Brown paper leaves


Once the mobile was up I had to carry on and dress the rest of the mantle, my vintage Sylvac pottery is perfect for an Autumnal display.


http://snadralovesblogging.blogspot.co.uk/
Sylvac Squirrel

http://snadralovesblogging.blogspot.co.uk/
Sylvac mouse

http://snadralovesblogging.blogspot.co.uk/
Sylvac deer

I jumped on the idea of using some of my vintage button cards to complete the display, this is in the room where I do my sewing so I can look up and  see these little lovelies while I am working. It seemed to be lacking a little punch of colour and I hit on the idea of using some of my sewing threads which seem to do the trick.

The old mobile has now been consigned to the log burner to have one final useful role in helping to start the fire.  Who says recycling can't be fun.

How are you marking the change in the season or are you hanging on to Summer a little longer?


Sunday, 2 August 2015

...recycled paper play

When we returned from holiday I brought back a book from the apartments we were staying at as I hadn't finished reading it, I left behind two that I had brought with me so I felt that it was fair.  This was no extraordinary book it was Wicked by Jilly Cooper, but I do feel committed once I start reading something to make it all the way through to the end.  However, there was something special about this particular edition to me, I knew I was the last person who was going to read it. towards the beginning of the book two pages had become dislodged from the spine and while I was on the beach the wind blew and took them away.

As I approached the end of the book I thought oh I'll just drop it in the recycling bin, but then I thought why not have a bit of fun, so I created a page in my Pinterest account called paper play and put up a few ideas.   My criteria was it had to be quick and simple to make, didn't require me to buy anything else and something  I could accommodate into my home easily and here are the results


WARNING - Jilly Cooper novels are quite saucey, I have viewed the photos and don't think there is anything offensive in there, please let me know if you spot anything and I will remove the  photo.


A floating hearts mobile


Decorated gift tags or confetti


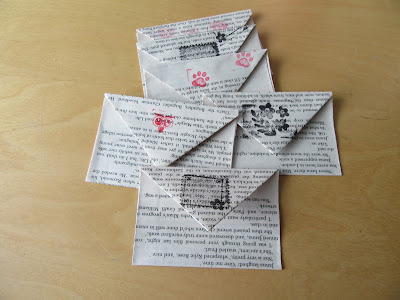
Decorative envelope bunting


They were all fun to do and quick to execute, I have hardly made a dent in the book so I will keep it for a short time and try a few more activities.  I think the envelopes are my favorite and have definitely potential to be made into an advent calendar.  I think I would choose a book who's material was more in keeping with the project, then you could highlight key words or sentences.

 Which is your favorite?  have you re-purposed any old books? can you suggest any other projects for the remaining pages?