Showing posts with label gift tags. Show all posts

Wednesday, 9 November 2016

Decoupage gift tags 33/50 - 50 makes of Christmas

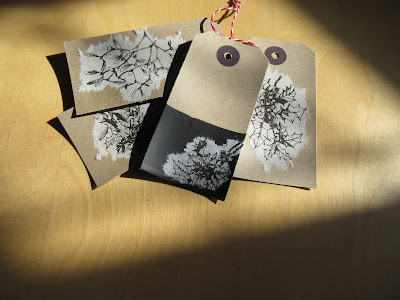
The first post I made for this challenge was my dipped gift tags, well I have been busy with the gift tags again and taken some of those tags a step further by applying decoupage.


http://snadralovesblogging.blogspot.co.uk/


The technique is simply to separate a single layer from a paper napkin, tear out the image that you want and glue onto the desired surface.  I shared this with you here when I up-cycled some of the clay ornaments I have been making.


http://snadralovesblogging.blogspot.co.uk/


It works well with the dipped tags, my only concern is that it might all be a bit monochrome but I am hoping that the use of lashings red ribbons and chunky red wool to attach them to the gifts will remedy that.


http://snadralovesblogging.blogspot.co.uk/


I had originally planned to use the red and white stripped string I showed in the photos but I think it does need something more robust to bring in a flash of colour.


http://snadralovesblogging.blogspot.co.uk/


They are already to be used, I now have to start sorting out what gifts I already have in that can be wrapped and tagged. Then I need to work out who is left to either buy for or make for.


Number 33 ticked off the list, leaving only 17 makes to go to complete my challenge of 50 makes for Christmas.


Am I the only one who thinks they will wrap their presents as they buy them and then every year I end up in front of a Christmas movie or two with a huge pile of presents and an equally huge pile of wrapping paper and ribbons.  The first few are all beautifully wrapped with coordinating ribbons and tags and look like something out of a magazine but by the end you are lucky if there is even enough paper on it let alone a tag!!



Wednesday, 26 October 2016

Brown paper gift bags - 50 makes for Christmas 28/50

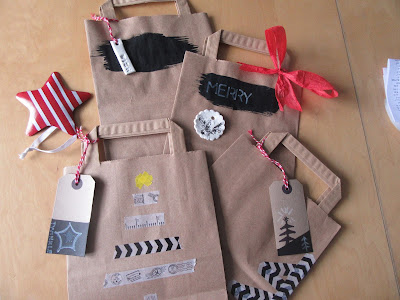
I feel I must make a confession before we get any further I brought these brown paper bags after I had started this challenge and so this doesn't fall into my criteria of using up things I already had in.  They were of course something I consider to be a bargain and I brought them from Amazon with a voucher I earned on Swagbucks so no hard cash was parted with!


http://snadralovesblogging.blogspot.co.uk/


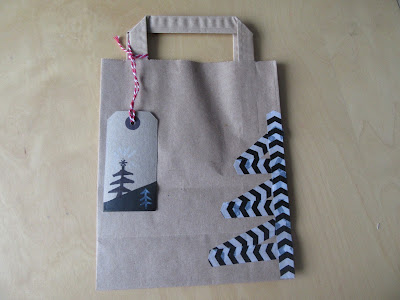
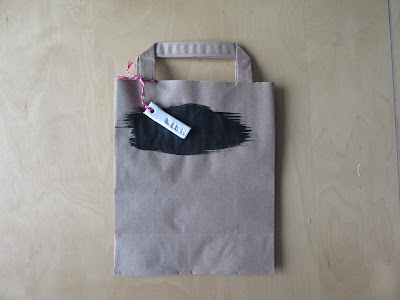
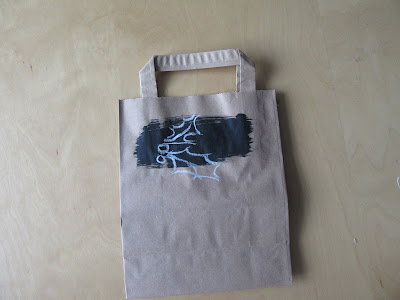
The trusty blackboard paint has been out again for a few of them leaving them open for either a festive message or a little Christmassy design


http://snadralovesblogging.blogspot.co.uk/

http://snadralovesblogging.blogspot.co.uk/


Complimented by a home-crafted gift tag


http://snadralovesblogging.blogspot.co.uk/


http://snadralovesblogging.blogspot.co.uk/


One of the many clay decorations


http://snadralovesblogging.blogspot.co.uk/


Finally jazzed up with Washi tape


http://snadralovesblogging.blogspot.co.uk/


http://snadralovesblogging.blogspot.co.uk/


These were great fun to do as I could just do a couple as and when I got a spare 10 minutes.


If you fancy having a go at making your own gift bags here is a tutorial from Tasha at designertrapped, this might come in useful for anything bigger than these lunchbox sized bags.


Make 28 completed and a mere 22 to go in my 50 makes for Christmas challenge.

Do you have any 10 minute makes that you squeeze in to your busy week?


Friday, 16 September 2016

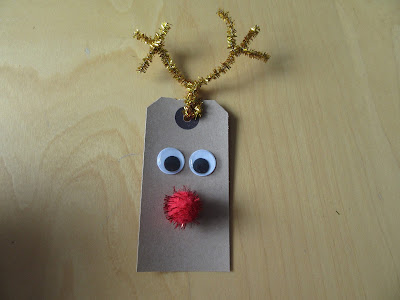
Rudolph gift tags - 50 makes for Christmas 17/50

These gift tags are really cute and easy to make so this is ideal to get children involved in.


http://snadralovesblogging.blogspot.co.uk/


In keeping with my plan to use up things I already had in, the tinsel pipe cleaners these were brought for 50p in the sale about 3 years ago, the googley eyes are from a kit I was given last year and the the red pom poms are recycled from last years Advent Adventure


http://snadralovesblogging.blogspot.co.uk

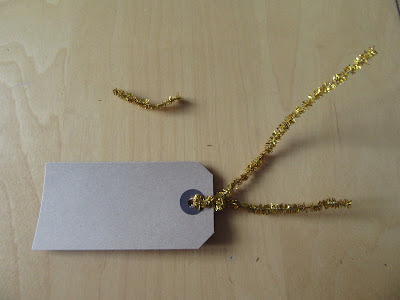
I poked the pipe cleaner through the hole at the top for the string, it needed a little bit of gentle manoeuvring so small children may need a bit of help with this.
 

http://snadralovesblogging.blogspot.co.uk

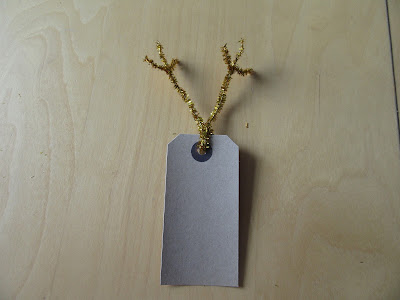
Snip about an inch to an inch and a half of the top of each side

http://snadralovesblogging.blogspot.co.uk

Twist the bit that has been snipped off onto the top of the pipe cleaner to create the antlers

http://snadralovesblogging.blogspot.co.uk

Work out the position of your pom pom nose and googley eyes

http://snadralovesblogging.blogspot.co.uk

Or in my case work out where you want to stick them and just plonk them on wherever!

http://snadralovesblogging.blogspot.co.uk

I used evo stick glue as that is what I had to hand but I think sticky fixers would be better if doing this project with children.  They have not been tested under the tree so I don't know how robust these will be.  We always seem to end up with at least a couple of presents without tags.  

We did have fun one year when my daughter carefully wrote out the gift tags to both her Grandmas with "to Grandma" they were sat side by side on the sofa and kept undoing each others presents :)

http://snadralovesblogging.blogspot.co.uk/

So that is make number 17 completed and I am well on my way to completing the first 20!

It looks like the sun has decided that it has done enough shining and the rain is making up for lost time.  I think that Nottingham has been quite lucky compared to other parts of the UK, over that past couple days of days I have seen some real horror pics on FB with lightening strikes, flooding and a train derailed due to a landslide!  I hope you are all safe and dry and that the weather doesn't hinder your weekend plans.

Saturday, 4 June 2016

Dipping Gift tags - 50 makes of Christmas 1/50

Having drawn up my list for 50 makes of Christmas I am kicking things off with a very quick easy project that can be used for gifts at anytime of the year, although mine have Christmassy pics drawn on.

http://snadralovesblogging.blogspot.co.uk/


I dipped kraft gift tags in that pot of blackboard paint that is still going strong!

Gently shake off some of the excess, tap on the side of the pot but only the dipped area or you may get smudges on the clean sides., I learnt by making that mistake!

http://snadralovesblogging.blogspot.co.uk/


I strung them out to dry using a bit of string and some carefully chosen tins from the pantry (small tins to sit on top of big tins!


http://snadralovesblogging.blogspot.co.uk/


 It took less than 30 minutes and the trickiest part was threading them on to the piece of string to dry them off!


http://snadralovesblogging.blogspot.co.uk/


There was a certain amount of dripping which is to be expected and I did try and incorporate this into another tag but it just looked very messy. I think I prefer the clean lines of the dipped tags.


http://snadralovesblogging.blogspot.co.uk/


I will do a second batch as I want to mess around with them a little more and I have washi tape and punches to play with.

http://snadralovesblogging.blogspot.co.uk/


I am just thinking that maybe a similar effect could be achieved by pressing the tags onto an ink pad, now you see how my original list of 24 grew, one idea seems to begat another!

Let me know if you have any experience with using chalkboard paint on kraft tags or have you had good results using other paint types?

That is the first one down just forty nine more to go at! at a rough estimation I will need to do about 2 a week to fit them all in before Christmas, however, I can foresee a rush in the later part of the year when I suddenly realise that I haven't squeezed them all in!


Thursday, 26 November 2015

Advent Calendar .... the count down has begun pt3

Time is ticking on my Advent project, I could almost do a count down on my count down! so expect a flurry of activity on the blog over the next few days. Oh and we are having a give away!!


http://snadralovesblogging.blogspot.co.uk/


A nice simple make today as I turn my attention to gift tags, both as part of my Advent calendar and also for using on gifts.


http://snadralovesblogging.blogspot.co.uk/


When used in the Advent calendar I am going to attach a string at the bottom and tie in pieces of paper with the joke and the daily photo challenge, sort of like bows on the string of a kite.   I am not 100% sure if this is going to work but part of this creative process is taking an idea and giving it some time.


http://snadralovesblogging.blogspot.co.uk/


I have followed on with the same theme as the envelopes I made in pt 2 of my Advent calendar project.  I have introduced some stickers that were a part of my Christmas crafting stash, from Cox and Cox, yes of course they were an old sale bargain. I have tried to take them beyond the edges to create a less uniformed look.


While the advent tags are completley over the top, no holds barred I have pulled it back a bit with some of the gift tags, keeping it simple, less being more.


http://snadralovesblogging.blogspot.co.uk/


I have used punches and rubber stamps in some of my designs and I know that they may be considered to be uneconomical for the amount of use they are given. My thoughts are that they should last a long time and can be sold on when you no longer want them, so I consider them as a  investment. Some of the smaller stamps like the ones I brought from Hema are fairly low cost and they do pop up in the pound shops every now and again so not too much to pay out.


http://snadralovesblogging.blogspot.co.uk


Finally the simplest of all, this was made with part of a page I recycled from the book I am still trying to craft my way through that I introduced here ,


As the spirit of christmas is starting to wend its way towards us I am having a little give away, I will make up a little goodie bag with blank tags and some stickers for you to craft your own gift tags. To enter just leave a comment below and I will pick one at random on December 1st (UK only sorry) as I don't get many visitors its got to be worth a go.


Sunday, 2 August 2015

...recycled paper play

When we returned from holiday I brought back a book from the apartments we were staying at as I hadn't finished reading it, I left behind two that I had brought with me so I felt that it was fair.  This was no extraordinary book it was Wicked by Jilly Cooper, but I do feel committed once I start reading something to make it all the way through to the end.  However, there was something special about this particular edition to me, I knew I was the last person who was going to read it. towards the beginning of the book two pages had become dislodged from the spine and while I was on the beach the wind blew and took them away.

As I approached the end of the book I thought oh I'll just drop it in the recycling bin, but then I thought why not have a bit of fun, so I created a page in my Pinterest account called paper play and put up a few ideas.   My criteria was it had to be quick and simple to make, didn't require me to buy anything else and something  I could accommodate into my home easily and here are the results


WARNING - Jilly Cooper novels are quite saucey, I have viewed the photos and don't think there is anything offensive in there, please let me know if you spot anything and I will remove the  photo.


A floating hearts mobile


Decorated gift tags or confetti


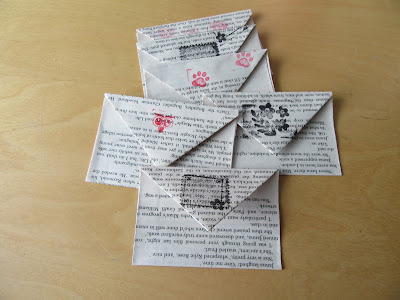
Decorative envelope bunting


They were all fun to do and quick to execute, I have hardly made a dent in the book so I will keep it for a short time and try a few more activities.  I think the envelopes are my favorite and have definitely potential to be made into an advent calendar.  I think I would choose a book who's material was more in keeping with the project, then you could highlight key words or sentences.

 Which is your favorite?  have you re-purposed any old books? can you suggest any other projects for the remaining pages?